This guide provides a step-by-step, beginner-friendly walkthrough to install the Mojo programming language on macOS, Linux, and Windows, covering all officially supported methods.
Introduction to Mojo Programming Language
Mojo programming language combines the simplicity of Python with the speed and efficiency of C++. As of 2026, Mojo programming language has matured significantly and is now considered production-ready, especially for AI, machine learning, and high-performance computing tasks.
Key Features of Mojo Programming Language
- High Performance: Mojo is built to handle tasks that require a lot of calculations and processing quickly.
- Python Compatibility: Users familiar with Python will find it easy to transition to Mojo, as it uses similar syntax, making it simple to run Mojo programs.
- Versatile Applications: From AI development to machine learning, the Mojo language offers flexibility for various applications, including data processing and software development.
System Requirements for Mojo
Before you start the Mojo installation, confirm that your system meets the following requirements:
For macOS
- Apple Silicon (M1/M2/M3)
- macOS Sequoia (15) or later
- macOS Ventura (13) or later
- Python 3.9 – 3.12
- Xcode or Xcode Command Line Tools
- Homebrew
For Ubuntu
- Ubuntu 22.04 or later (or compatible distro)
- x86-64 CPU (with SSE4.2 or newer) or ARM64 (AWS Graviton2/3)
- Minimum 8 GiB RAM
- Python 3.9 – 3.12
- glibc 2.34 or later
For Windows
- Windows 10/11
- WSL2 (Windows Subsystem for Linux) is recommended
Where to Run Commands
- macOS: Terminal
- Linux: Terminal
- Windows: WSL2 (Ubuntu terminal)
Do NOT run commands in PowerShell or CMD.
Official Methods to Install Mojo (2026)
You can install Mojo using three official approaches:
- Pixi (Recommended): best for environments & projects
- Modular CLI: quick setup
- UV (Python-based workflow): lightweight Python tooling approach
Note: All methods work on macOS, Linux, and Windows (WSL2). Only the terminal environment differs.
Method 1: Install Mojo using Pixi (Recommended)
Works on: macOS, Linux, Windows (WSL2)
Step 1: Install Pixi
curl -fsSL https://pixi.sh/install.sh | sh

Step 2: Create Project
pixi init hello-world \
  -c https://conda.modular.com/max-nightly/ -c conda-forge \
  && cd hello-world

Step 3: Install & Run
pixi add mojo
pixi shell


Step 4: Verify Installation:
mojo --version

Method 2: Install Mojo using Modular CLI (Quick Setup)
Works on: macOS, Linux, Windows (WSL2)
This is the official and easiest way to install Mojo.
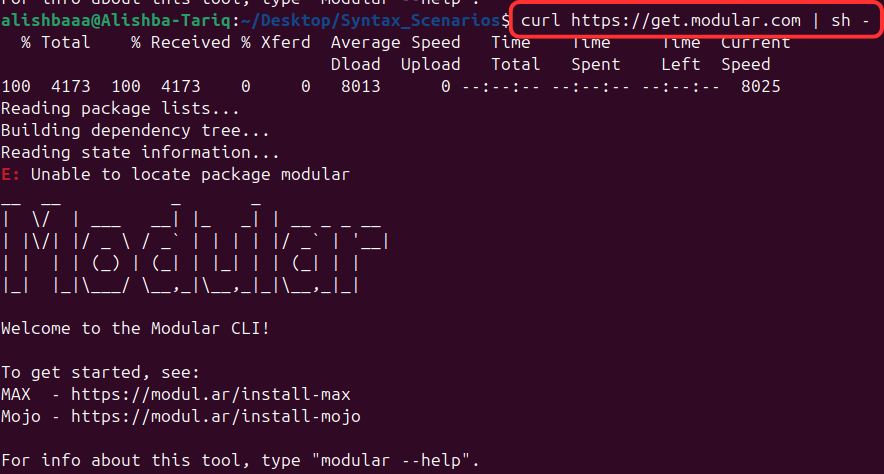
Step 1: Install Modular CLI
Open your terminal and run:
curl https://get.modular.com | sh -
Step 2: Install Mojo SDK
modular install mojo
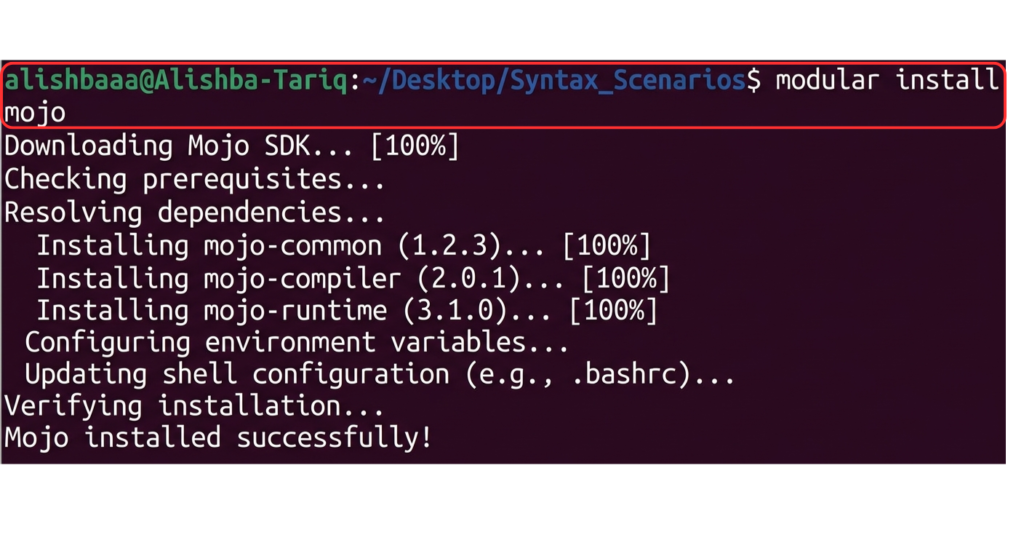
This will download and set up the complete Mojo development environment.
Step 3: Verify Installation
mojo --version

Method 3: Install Mojo using UV (Python Workflow)
Works on: macOS, Linux, Windows (WSL2)
Step 1: Install UV
curl -LsSf https://astral.sh/uv/install.sh | sh
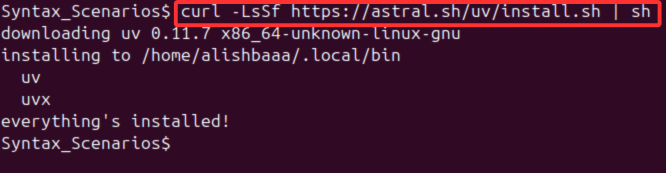
Restart the terminal after installation
Step 2: Create Project
uv init hello-world && cd hello-world

Step 3: Create Virtual Environment
uv venv && source .venv/bin/activate

Step 4: Install Mojo (Nightly)
uv pip install mojo \
  --index https://whl.modular.com/nightly/simple/ \
  --prerelease allow

Step 5: Verify Installation
mojo --version

OS Specific Notes (No Command Differences)
macOS
- Use Terminal
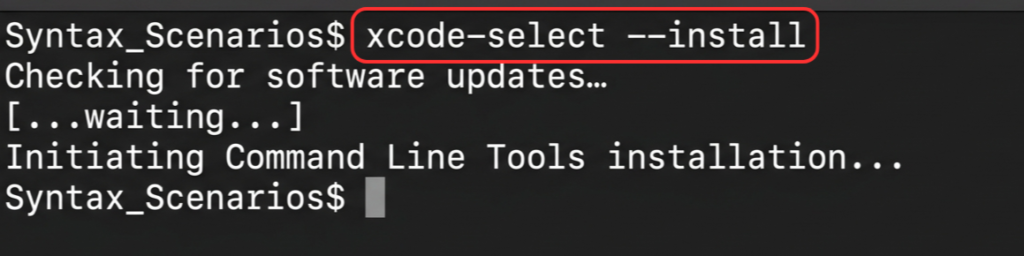
- If required, install developer tools:
xcode-select --install
- Then use any installation method (Pixi / Modular CLI / UV)
Linux
- Open Terminal
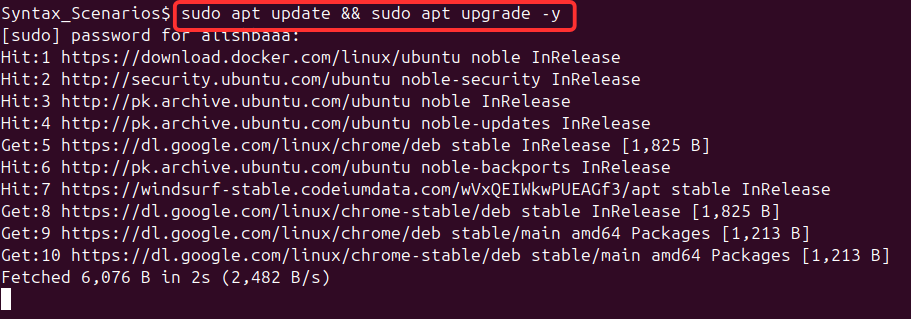
- Ensure system is updated (recommended):
sudo apt update && sudo apt upgrade -y
- Then use any installation method (Pixi / Modular CLI / UV)
Windows (WSL2)
You can use Mojo with WSL2 (Windows Subsystem for Linux). Here’s how to set it up:
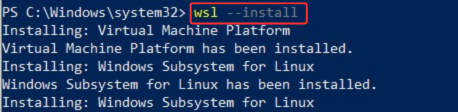
Step 1: Enable WSL2
- Open PowerShell (Admin) and run:
wsl --install
- Restart your system if prompted.
Step 2: Install Ubuntu
- Install Ubuntu 22.04 from the Microsoft Store
- Launch Ubuntu once installed
- Create your Linux username/password
Step 3: Update Ubuntu (recommended)
sudo apt update && sudo apt upgrade -y

Step 4: Install Mojo (choose any method)
- Now use any installation method (Pixi / Modular CLI / UV)
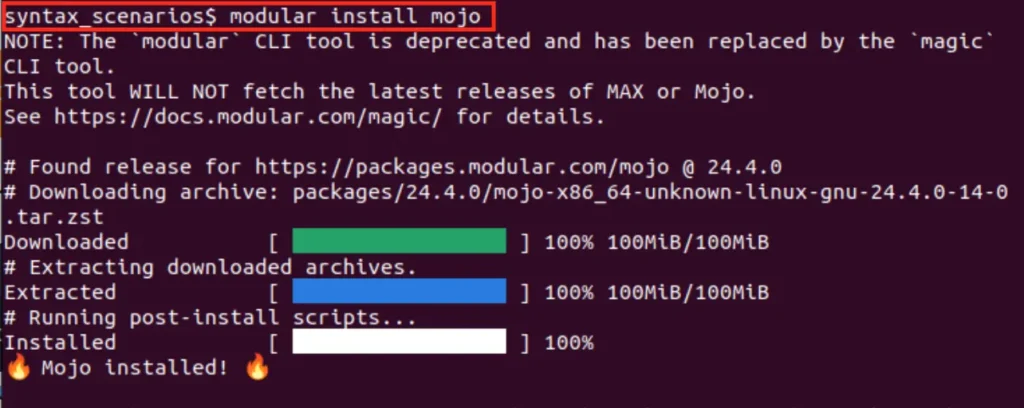
Run the command below to install the Mojo Language SDK. This will set up the necessary development environment for Mojo.
modular install mojo
How to Check the Version of Mojo?
To check the installed version of the Mojo Language SDK, open your terminal and run the following command. This will display the current version
mojo --version

Create Your First Mojo Project
Now that you have Mojo installed, you can start coding. Magic organizes projects in a clear way, making it simple to run Mojo programs in separate environments. This helps keep your work organized and avoids conflicts between different projects.
In Mojo, code files have a .mojo extension. To write your first program, open a text editor like VS Code, create a new file, and save it as hello.mojo. Inside hello.mojo, write a simple code that prints “hello world.” When you run this file, it will display “hello world” in the terminal.
fn main():
    print("Hello, World!")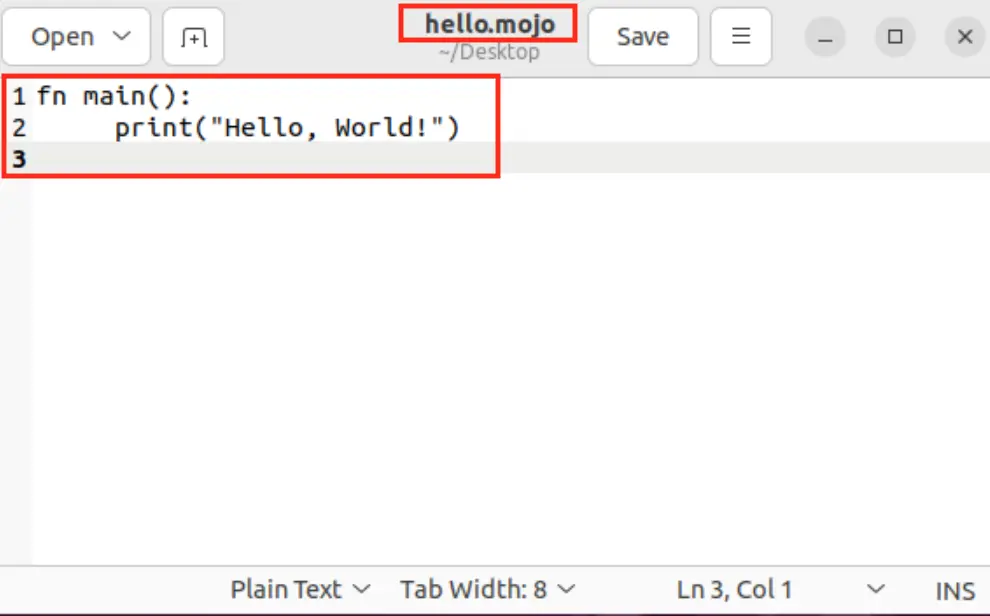
Run the Mojo Program: To run the Mojo program use the mojo command with the file name to execute your program, which will display “Hello, World!” in the terminal.
mojo hello.mojo

Use Mojo in VS Code
Using VS Code with Mojo makes coding easier by providing features like color coding for different parts of the code, checking for errors, and having a terminal built into the editor.
Step 1: Install Visual Studio Code
- Download VS Code from the official Visual Studio Code website.
- Follow the installation instructions for your operating system (available for macOS, Linux, and Windows).
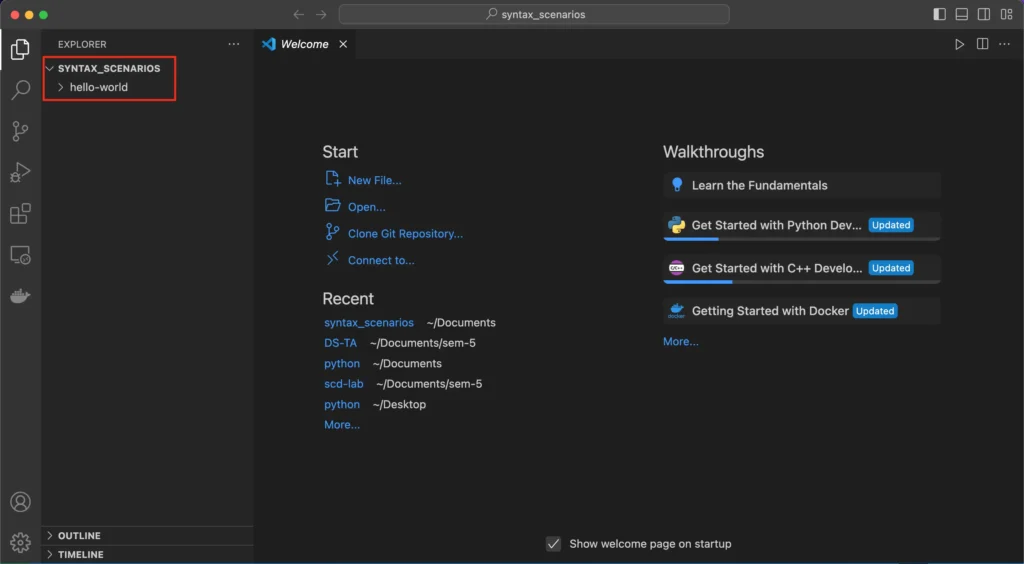
Step 2: Open Your Mojo Project in VS Code
Once you have installed VS Code, navigate to your Mojo project directory (for example, hello-world).
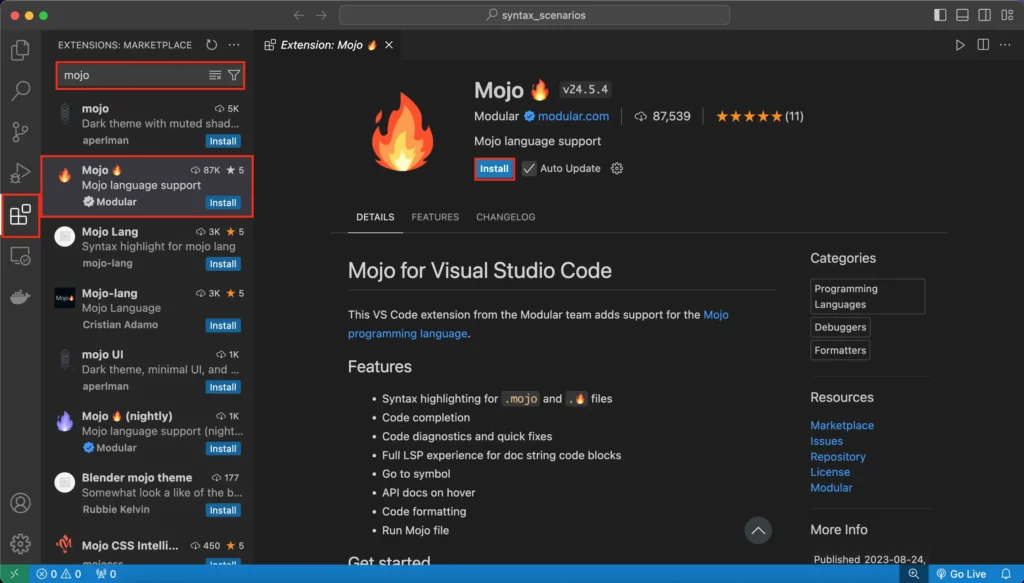
Step 3: Install Extension for Mojo Development
To install the Mojo extension in Visual Studio Code, follow these steps:
- Go to the Extensions tab on the left side and click on it.
- Type “Mojo” in the search bar.
- Click on the extension with the fire logo and the company name “Modular,” which has a verified tick.
- Look for the “Install” button and click it to install the extension.
Step 4: Write and Run Mojo Code
With everything set up, you can now create and run Mojo programs within VS Code. Now, in the Explorer sidebar, right-click your project folder, select New File, and name it hello.mojo. Open hello.mojo and add a simple Mojo program and run the file.
fn main():
    print("Hello, World!")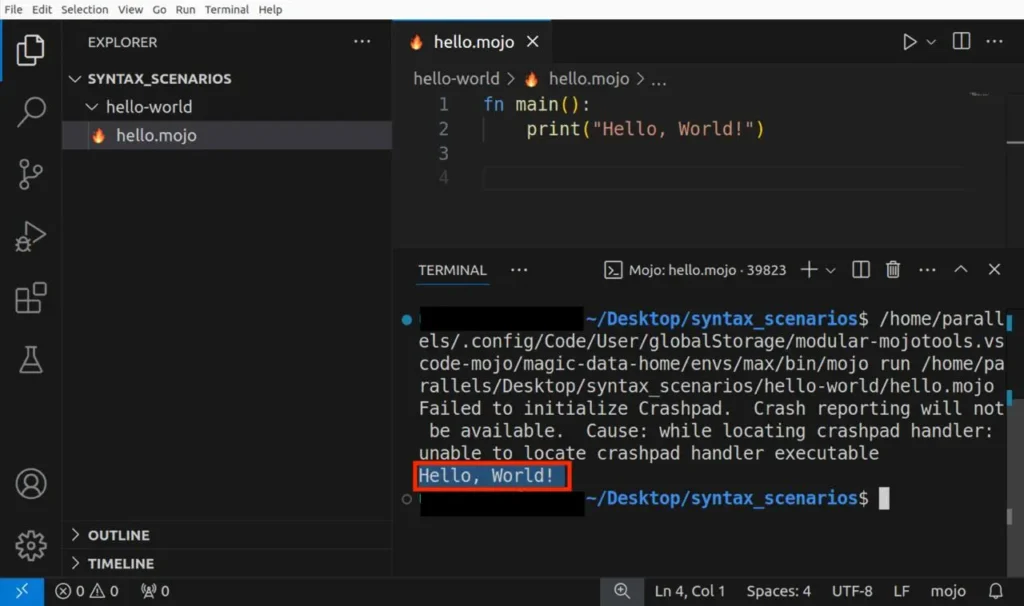
Common Errors and Fixes
- mojo not found: Activate environment or restart terminal
- modular not found: Reinstall Modular CLI
- uv not found: Restart terminal after install
- WSL issues: Ensure Ubuntu is installed and updated
FAQs
1. Can I install Mojo on Windows without WSL2?
No. Mojo is not natively supported on Windows. You must use WSL2 (Linux environment) to install and run it.
2. Which installation method is best for beginners?
Pixi is the best option because it automatically manages environments and dependencies, making setup easier and safer.
3. Do I need all three tools (Pixi, Modular CLI, UV)?
No. You only need ONE method. Choose based on your workflow.
4. Is Mojo stable and production-ready?
Yes. As of 2026, Mojo is production-ready and actively used for AI and high-performance computing tasks.
5. Why do I need a virtual environment for Mojo?
Virtual environments prevent dependency conflicts and keep projects isolated, especially when using Pixi or UV.
6. Can I switch between Pixi, UV, and Modular CLI later?
Yes, but it is recommended to stick with one method per project to avoid conflicts.
Conclusion
This guide has walked you through installing Mojo, creating a project, setting up VS Code, and running your programs. Each step is well-researched, tested, and verified, which is the aim of Syntax Scenarios, so that beginner programmers can easily find and understand what they are looking for. With VS Code, you now have a strong setup for coding with Mojo, making it easier to work on complex tasks. For more detailed information and advanced topics, you can visit the official Mojo documentation.